# Radio Master TX16S Setup
In V2.2 SBUS output on Head Tracker is on TX pin P1.03. You can also receive SBUS on the RX pin P1.10. To activate SBUS output, under the UART tab choose **SBUS In + Out** for more information on this screen see [/pages/r5e6xMLdC8EIiseir0iO#sbus-in-+-out](https://headtracker.gitbook.io/head-tracker-v2.2/getting-started/wiring/option-2-wired/serial-bus-sbus/pages/r5e6xMLdC8EIiseir0iO#sbus-in-+-out "mention")
You can also adjust the update rate in the GUI to whatever you desire.\
\* **If your using this as a receiver board (Option 3) I would suggest 80Hz. which will match the Bluetooth update rate.**
### Wiring
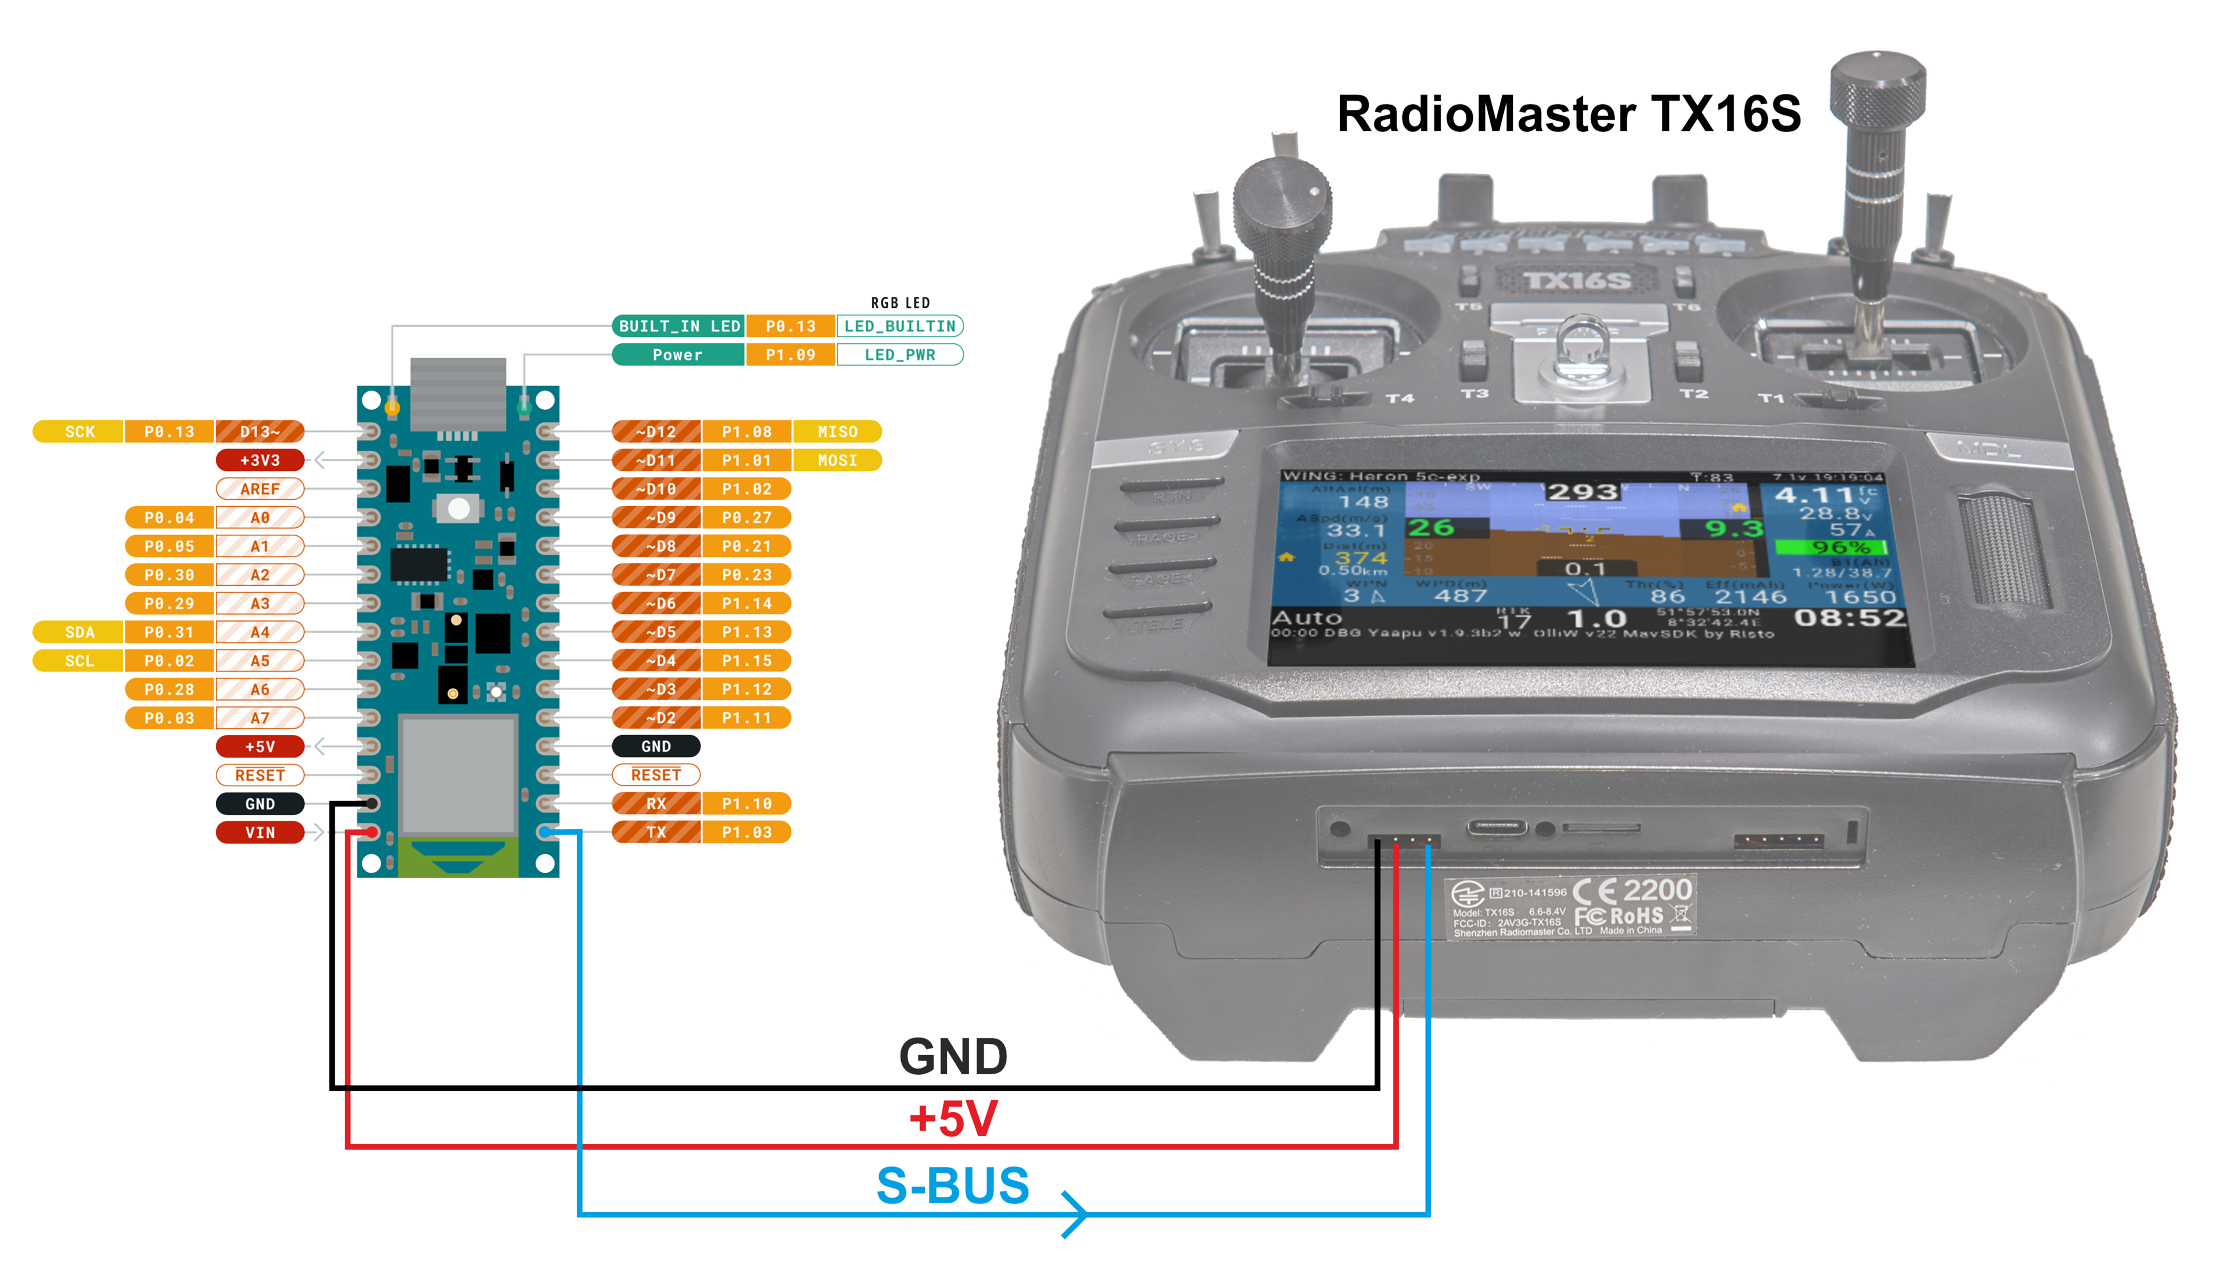
You can connect your Head Tracker to TX16S AUX1 or AUX2 port as follows:
#### Connections (AUX1 or AUX2)
* GND to GND
* VIN to 5V pin, and
* TX of Nano P1.03
TX16S AUX TX remains unconnected. The Arduino Nano 33 BLE / BLE Sense gets powered via RadioMaster TX16S AUX port, no extra power is required.
{% hint style="info" %}
SBUS Trainer via the bottom UART ports requires **Open TX version 2.3.10** or newer. EdgeTX is supported from 2.4 and up
{% endhint %}
{% hint style="info" %}
If you have a Open/Edge TX firmware with Bluetooth you will only see one Serial Port listed. This is AUX1 port (Left one in above photo). Bluetooth uses AUX2 in this case (The right one)
{% endhint %}
### Head Tracker GUI Settings
In the GUI the **inverted** option **needs to be selected**. SBUS uses a idle signal level which is low. Radio Master expects a standard UART signal, which is idle high.
If you are running a direct **wired connection** to the AUX port you can increase the **Update Rate** to the full **140Hz**. If you are using this in wireless mode **(Option 3) Choose 80Hz**, which will match the Bluetooth update rate.
### Settings in EdgeTX/OpenTX
* set SYSTEM -> HARDWARE -> Serial port to SBUS Trainer (left image shows EdgeTX, right image OpenTX):
 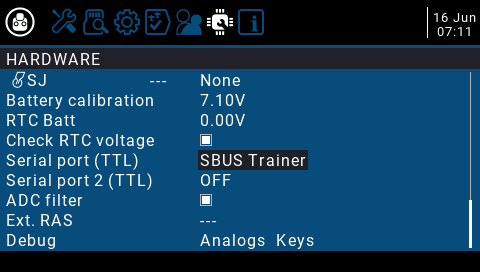
Please note that OpenTX (up to v2.3.12) erroneously lists TTL for serial ports - TX16S uses 3.3V logic levels!
* In MODEL -> MODEL SETUP -> Trainer, set Mode to Master/Serial
 
* For testing purposes, the next example enables all 16 SBUS channels from HeadTracker. Lets create for this under MODEL -> SPECIAL FUNCTIONS a special function `Trainer` with value `Chans` and lets enable it (tick the checkbox). The following example uses switch C position up for overriding all 16 SBUS channels with data from HeadTracker:
 
In a permanent setup, you most likely only want to override a few specific channels from HeadTracker - for this, skip the special function and choose TR(x) in mixes page on the specific channels you want to include, instead.
### **Verifying the operation**
* To verify that all works as expected, select from main menu (long roller press) Channel Monitor (EdgeTX) or Monitors (OpenTX):
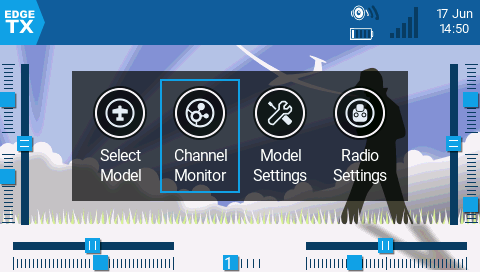 
* Check the channel values in the channel monitor. Flipping switch C up, should show the HeadTracker channels in the upper bars of each channel (the examples here show a signal for only the first 3 channels):
 
---
# Agent Instructions: Querying This Documentation
If you need additional information that is not directly available in this page, you can query the documentation dynamically by asking a question.
Perform an HTTP GET request on the current page URL with the `ask` query parameter:
```
GET https://headtracker.gitbook.io/head-tracker-v2.2/getting-started/wiring/option-2-wired/serial-bus-sbus/radio-master-tx16s-setup.md?ask=
```
The question should be specific, self-contained, and written in natural language.
The response will contain a direct answer to the question and relevant excerpts and sources from the documentation.
Use this mechanism when the answer is not explicitly present in the current page, you need clarification or additional context, or you want to retrieve related documentation sections.